Using The Dojo Toolkit's Ajax Tools
The Dojo Toolkit is an Ajax framework that differs from the Prototype Framework in that it is much larger and it includes user interface components in addition to handling Ajax asynchronous requests. This lesson will focus on Dojo's Ajax capabilities in the form of a pretty simple example. I won't go into the detail that I did with the Prototype Framework. I'll spend more time on the user interface components instead in the next lesson. You can download the Dojo Toolkit from http://dojotoolkit.org/downloads. You'll need to expand the archive to use it in your web application.
The Dojo Toolkit contains a number of objects that perform asynchronous requests. Each object contains the prefix xhr and the name of the method to use to fetch data. I'll use the dojo.xhrGet object. Dojo also possesses xhrPost, xhrPut, and xhrDelete objects. The dojo.xhr objects, like the Ajax.Request object in the Prototype Framework are configured using JSON. So, you create the object and configure it at the same time. When the object is created, the request is made automatically.
1. Create a new Web Application in Netbeans. Name it DojoToolkit. Set the Server to Tomcat. Click Finish.
2. Copy the allBooks.xml file from theAjaxBooks3 project to the Web Pages node. You can do this inside Netbeans.
3. Right-click the Web Pages node and choose New > Folder. Name the folder script. Click Finish.
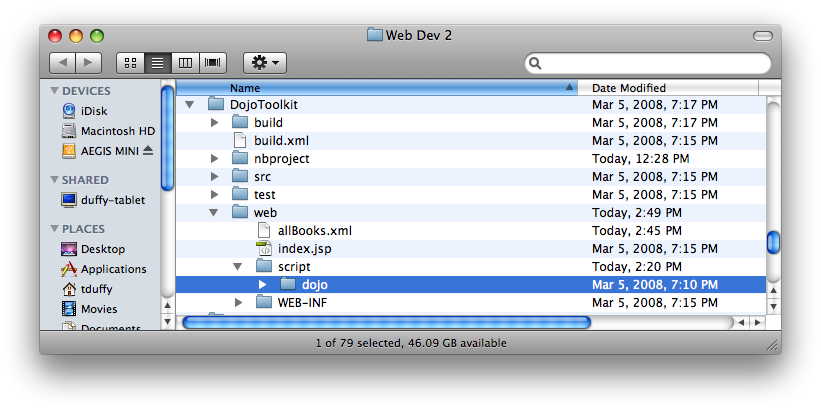
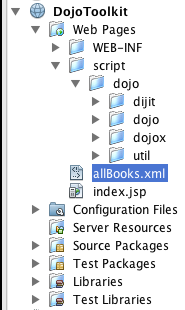
4. Copy the expanded Dojo Toolkit into the script folder. I did this in the filesystem.
Your Project Tree should look something like this:
5. Right-click the Web Pages node and choose New > HTML... Name the file demoAjax. Click Finish. Add the following code inside the <body> tag:
<input type="submit" value="Get Books" onClick="getBooks()" />
<div id="books"></div>
6. Add a <style> element to the <head> of the document:
    <style>
        record, record title{
            display: block;
            padding: 10 0;
        }
    </style>
7. Add a reference to dojo.js in the <head>:
<script type="text/javascript" src="script/dojo/dojo/dojo.js"></script>
8. Add a<script> element to the head of the document and create the getBooks() function:
        function getBooks(){
            dojo.xhrGet( {
            url: "allBooks.xml",
            handleAs: "text", //as in responseText
            timeout: 5000,
            //load callback called on success
            load: function(response, ioArgs) {
              dojo.byId("books").innerHTML = response;
              return response;
            },
            //error callback called on failure
            error: function(response, ioArgs) {
              alert("HTTP status code: ", ioArgs.xhr.status);
              return response;
              }
            });
        }
9. Right-click the file and choose Run File.
Much of the code above mirrors that written for Prototype. Dojo uses the handleAs option to determine the type of data returned. The load and error options function nearly identically to onSuccess and onFailure in Prototype. Note the return of the response at the end of the callbacks. The Dojo help files say this helps ensure the propagation of the object for any other callbacks. If you don't return the response in the load callback, for example, the error callback may fire too.
The Dojo Toolkit contains a mechanism that mirrors Prototype's form.serialize() function. It's even easier to use - you just specify a form in the options list and Dojo takes care of the rest.
10. Copy the filterBooks.jsp file from the AjaxBooks3 project and paste it into the Web Pages node. You can do this right in Netbeans.
11. Add a <form> to the <body> element:
<form id="frmCategory">
All Books<input type="radio" name="category" value="all" selected="true"/><br />
Database<input type="radio" name="category" value="database" /> <br />
Web<input type="radio" name="category" value="web" /> <br />
Programming<input type="radio" name="category" value="programming" /> <br >
Graphics<input type="radio" name="category" value="graphics" /> <br />
HTML<input type="radio" name="category" value="HTML" /> <br />
JavaScript<input type="radio" name="category" value="JavaScript" /><br />
<input type="button" value="Get Books By Category" onClick="getBooksByCategory()"/>
</form>
12. In the <script> create the getBooksByCategory() function:
        function getBooksByCategory(){
            dojo.xhrGet( {
            url: "filterBooks.jsp",
            handleAs: "text", //as in responseText
            timeout: 5000,
            form: 'frmCategory',
            //load callback called on success
            load: function(response, ioArgs) {
              dojo.byId("books").innerHTML = response;
              return response;
            },
            //error callback called on failure
            error: function(response, ioArgs) {
              alert("HTTP status code: ", ioArgs.xhr.status);
              return response;
              }
            });
        }
That's pretty cool!
Although the Dojo Toolkit seems like it is much larger than the Prototype Framework - and it is on disk - it is modular. So, you only use the features you need. The dojo object takes care of what it needs in this case. Later, we'll use the dojo.require() function to include more resources. In fact, using the Dojo Toolkit, in this case, might actually use fewer resources than the Prototype Framework did in the previous lesson.