Using the Prototype Framework
As you have discovered, Ajax can be pretty code-intensive when you roll your own implementations of Ajax features. Wouldn't it be nice if at least some of the work was done for you? All of the repetitive code you've written so far forms the beginning of an Ajax framework upon which you can build. The good news is that pre-written frameworks already exist whose sole purpose is to make writing Ajax code easier for you. Most frameworks are free and you are welcome to use them how you see fit.
There are two kinds of frameworks available to the Ajax developer: client side and server side. They work exactly as you would expect. Client side frameworks are generally JavaScript libraries that you include with your files. You then call the functions in the framework as if they were your own. Server-side frameworks are installed on the server and usually process code on the server so that Ajax functionality is pushed down to the client. That is, you write code in the server-side language and the output is translated into client-side JavaScript.
This lesson focuses on using the Prototype Ajax Framework. You can download the Prototype framework from http://www.prototypejs.org/download. The Prototype framework is a small (124Kb) JavaScript file that you include in your web application. As of this writing, the current version is 1.6.0.2. If you open the prototype.js file in a text editor, you will see line after line of JavaScript code. The absolute best part about using a framework is that you don't have to worry about how the code works! You are only interested in what the code can do for you.
The Prototype Framework makes extensive use of JavaScript Object Notation (JSON). JSON is a data exchange format that is quickly becoming the "x" in Ajax - replacing XML. There are a few reasons why JSON is preferred by some developers. First, it is less verbose than XML. One of the problems in tag-based languages is that the markup can become cumbersome and repetitive. Think about implementing an HTML table. Sometimes there is more markup than there is data. JSON eliminates the need to include the tags with every property. Second, JSON is a subset of JavaScript - or, more formally - ECMAScript. You can pass a JSON string to the built in JavaScript eval() function and get back a JavaScript object. That's handy! It's important to note that JSON is just another way to describe JavaScript objects. Before continuing, you should read the following:
1. If you haven't done so already, download the Prototype Framework from http://www.prototypejs.org/download.
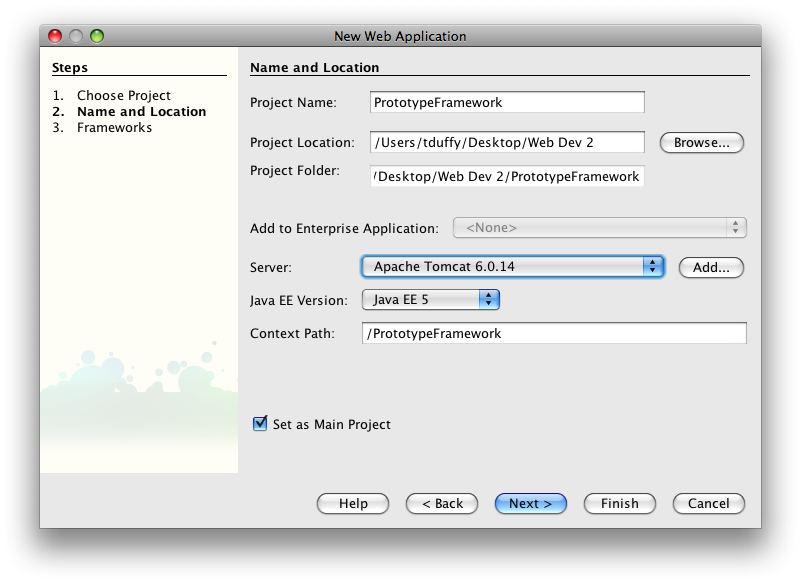
2. Start a new Web Application in Netbeans. Name it PrototypeFramework. Click Finish. Netbeans will create the project for you.
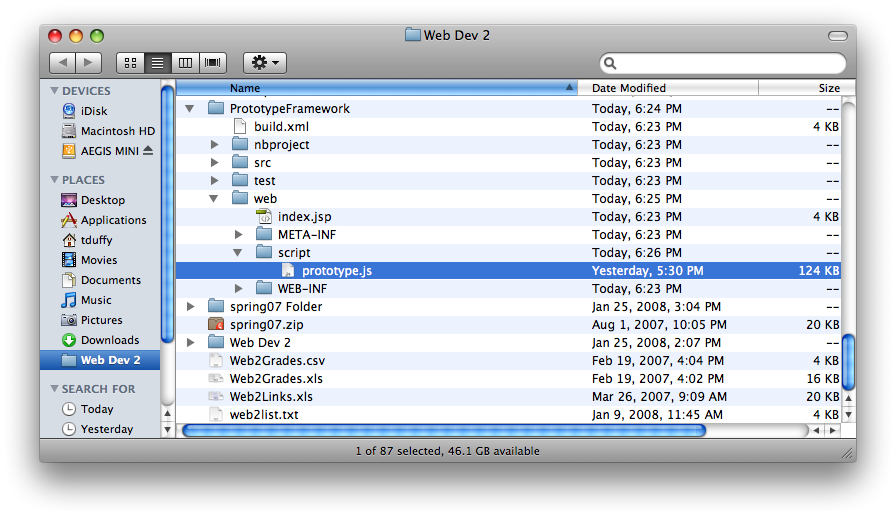
3. Right-click the Web Pages node and choose New > Folder. Name the folder scripts. Copy the Prototype Framework to the scripts folder. I did this in the file system, not inside Netbeans. Note: I changed the name of the file to make it easier to type in the name later.
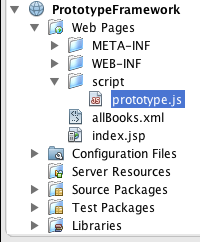
4. Copy the allBooks.xml file from the AjaxBooks3 project and paste it into the Web Pages node. You can do this right inside Netbeans. Your project tree should look something like this:
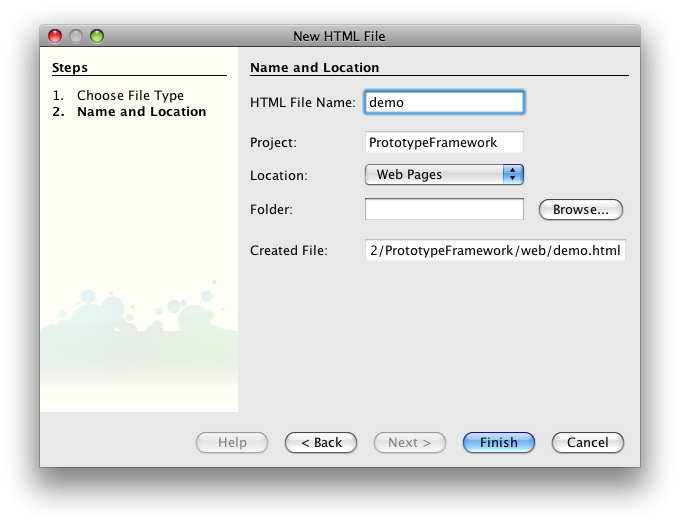
5. Right-click the Web Pages node and choose New > HTML... Name the file demo and click Finish.
6. Add a reference to the Prototype Framework to the <head> of the document. Since the framework is just a JavaScript file, you add the reference just like any other external JavaScript file.
<script type="text/javascript" src="script/prototype.js"></script>
One of the great things about the Prototype Framework is the ease with which you can make asynchronous XMLHttpRequests. You use the pre-built Ajax.Request object to make requests. The request is sent as soon as you create the object so you must configure the Ajax.Request object during the creation process. A request takes the form:
new Ajax.Request('url',{options});
The options parameter is written using JSON. So, to request data from the allBooks,xml file in your project using the GET protocol, you would write something like this:
new Ajax.Request('allBooks.xml', { method:'get' });
The Ajax.Request object defaults to POST as it's method, so you must explicitly specify method: 'get' to use the GET method.
In previous projects, you wrote event handlers to deal with the sending of the request and then callback handlers to to deal with the response. The Prototype Framework incorporates callbacks in the creation process. Ajax.Request objects perform asynchronously by default so you must incorporate callback functions in the creation process. You do this by including them in the options parameter. Avaliable callbacks include:
7. Add a <script> block to the head of the document and create the sendReq() function:
        function sendReq(){
            var req = new Ajax.Request('allBooks.xml',{
                method : 'get',
                onSuccess : function(transport){
                    alert(transport.responseText);
                },
                onFailure : function(){
                    alert('something went wrong...');
                }
            });
        }
The above code creates a new Ajax.Request, sets its url to allBooks.xml, and includes 3 options: the method is set to GET and 2 callback are declared. The onSuccess callback is fired when the request returns succesfully. The onFailure callback is fired if something goes wrong. Both callbacks are defined by anonymous functions - functions with no names. In essence, the function is declared in place. The first parameter passed to both is the native xmlHttpRequest object (in this case named transport) from which you can use its responseText and responseXML properties, respectively.
8. Add an onLoad event to the <body> tag that calls sendReq():
<body onLoad="sendReq()">
9. Right-click the demo.html file and choose Run File. An alert box displaying the XML should display. If you can't see the OK button, don't worry, just hit the Enter or Return key to dismiss it.
That was extremely easy, wasn't it? Of course it isn't as useful as it could be. Let's try something else. Suppose you were bulding a web based editor and wanted to load the contents of allBooks.xml into a <textarea> for editing. That's easy - just modify the onSuccess callback so that it targets a <textarea> on your page.
10. Add the <textarea> to receive the contents of allBooks.xml to the <body> of the document. Also add a button to trigger the event (although you could do this in the onLoad event as before).
<textarea id="txtXML" rows="20" cols="60"></textarea><br />
<input type="button" value="Get XML" onClick="loadText()" />
11. In the <script>, add the loadText() function:
        function loadText(){
            var req = new Ajax.Request('allBooks.xml',{
                method : 'get',
                onSuccess : function(transport){
                    $('txtXML').value = transport.responseText;
                },
                onFailure : function(){
                    alert('something went wrong...');
                }
            });
        }
The Prototype Framework includes the $() function. It is a shortcut for document.getElementById(). It just saves you having to type that error prone name over and over. Prototype adds many convenience methods to elements returned by the $() function: for instance, you can write
$('comments').addClassName('active').show()
to get the element with the ID 'comments', add a class name to it and show it (if it was previously hidden). The $ function might be worth installing Prototype on its own! You can learn more about the $() function - and other DOM capabilities at: http://www.prototypejs.org/learn/extensions.
12. Save the demo.html file and refresh it in the browser. You should be able to load the text into the <textarea>. (Note: you might want to remove the onLoad event in the <body> tag so that you don't have to continue to dismiss the alert box.)
Suppose you wanted to display the contents of the response rather than edit it. You could use the Ajax.Request object and the innerHTML property of a <div> element to do that. The Prototype Framework includes a separate object that does this automatically called Ajax.Updater. It is nearly identical to Ajax.Request except it expects the id of a target <div> element as its first parameter.
13. Create the target <div> and button trigger inside the <body> of the document:
<div id="booksData">Books data here</div>
<input type="button" value="Updater Button" onClick="updateBooksDiv()"/>
14. Create a <style> element inside the <head> to handle displaying the XML:
    <style>
        record, record Title {
            display: block;
            padding: 10 0;
        }

    </style>
15. Create the updateBooksDiv() function in the <script>:
        function updateBooksDiv(){
            new Ajax.Updater('booksData', 'allBooks.xml', { method: 'get' });
        }
16. Save the demo.html file and reload it in the browser. You should be able to load the books into the booksData <div> by clicking the Updater Button. That is almost too easy!
One of the things that Ajax developers do all the time is submit form data asynchronously. Since submitting the form defeats the purpose (it isn't asynchronous and requires loading entire pages in the browser), developers generally grab the form data piece by piece and send it off to the form handler as a query string or as post data. The Prototype Framework includes another helper method that is attached to all <form> elements named serialize(). The serialize method takes the id of a <form> element and submits the data in the form to a specified handler. In addition, the framework includes a mechanism so that you can include parameters in the request. The query string is used if the method is GET and a separate post is used if the method is POST.
17. Copy the filter.jsp file from the AjaxBooks3 project into the Web Pages node of the Web Application. Then create the <form> to be used to submit a category value to filterBooks.jsp. Finally, create the <div> to hold the filtered books.
<form id="frmCategory">
All Books<input type="radio" name="category" value="all" selected="true"/><br />
Database<input type="radio" name="category" value="database" /> <br />
Web<input type="radio" name="category" value="web" /> <br />
Programming<input type="radio" name="category" value="programming" /> <br >
Graphics<input type="radio" name="category" value="graphics" /> <br />
HTML<input type="radio" name="category" value="HTML" /> <br />
JavaScript<input type="radio" name="category" value="JavaScript" /><br />
<input type="button" value="Get Books By Category" onClick="getBooksByCategory()"/>
</form>
<div id="booksCategory">Books by category</div>
18. Create the getBooksByCategory() function in the <script>:
        function getBooksByCategory(){
            new Ajax.Updater('booksCategory', 'filterBooks.jsp', {
                method: 'get' ,
                parameters: $('frmCategory').serialize(true)
            });
        }
The code above uses the Ajax.Updater object and includes a parameters option. The parameters option specifies to send all of the fields in the frmCategory <form> off to filterBooks.jsp.
19. Save and reload the file in the browser to test it out. That's pretty cool!
Although this lesson covered a lot in terms of using the Prototype Framework's Ajax capabilities, it really barely scratches the surface. Certainly, you can accomplish a lot with what I've covered. However, if you want to learn more, the best place to start is with the Prototype Ajax Documentation available here: http://www.prototypejs.org/api/ajax.
You can download the code for this lesson here: PrototypeFramework.zip